
OREOPS application allows data sourcing to be done through API.
Create API Data Source
To create an API data source, navigate to the Source tab and click on the Add icon in the Object tab. On clicking, a new page is displayed as shown below:

Configuration
- Name – Name of the API
- Description – Short description of the JSON file for future reference.
- Category – Choose any one or all of the available categories
- Type – Choose API for API data source
Once the source is created, you can add methods either GET or POST to it based on the design requirement.

Methods (GET/POST)
- GET – GET allows you to request data from a specified resource.
- POST – POST allows you to send data to a server to create/update a resource.
- Base URL – Base URL will be displayed based on the selected connector in the config.
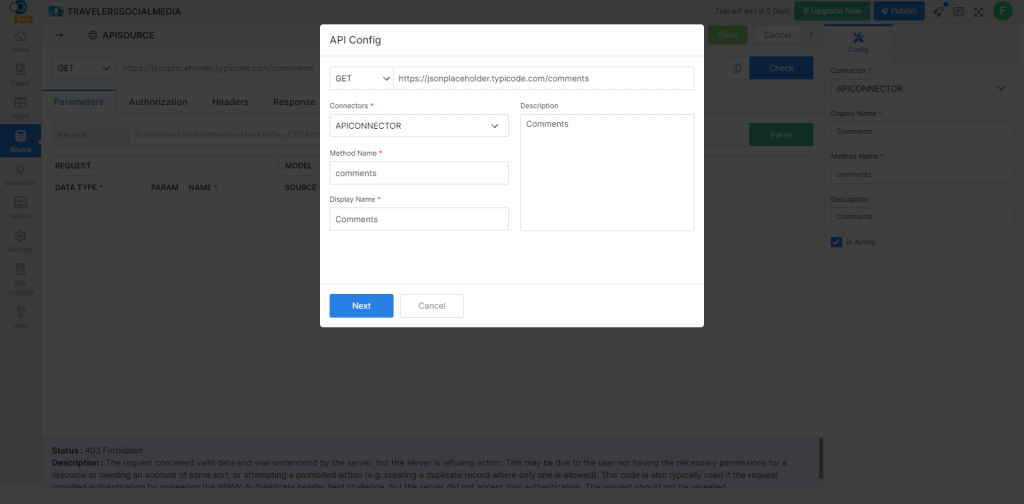
Configuration
- Connector – Choose a connector from the existing list of connectors
- Display Name – Provide a unique display name
- Method Name – Provide a unique method name
- Description – Short description of the model for future reference.
Parameter
Define the request parameters and the values here to use the methods. Click on the Add button to add a new parameter.
- Data Type – Choose the data type of the request parameter
- Name – Unique name of the request parameter
- Source – Choose the use model & API config sources to create request parameters. Select Static value if you wish to give direct value
- Model – Choose a model from the existing model list. This is applicable only for Source type-Model
- Field Name – Choose the Field name corresponding to the selected model. This is applicable only for Source type-Model
- Validation – Select validation type as either Mandatory or Optional
- Value – Value of the request parameter
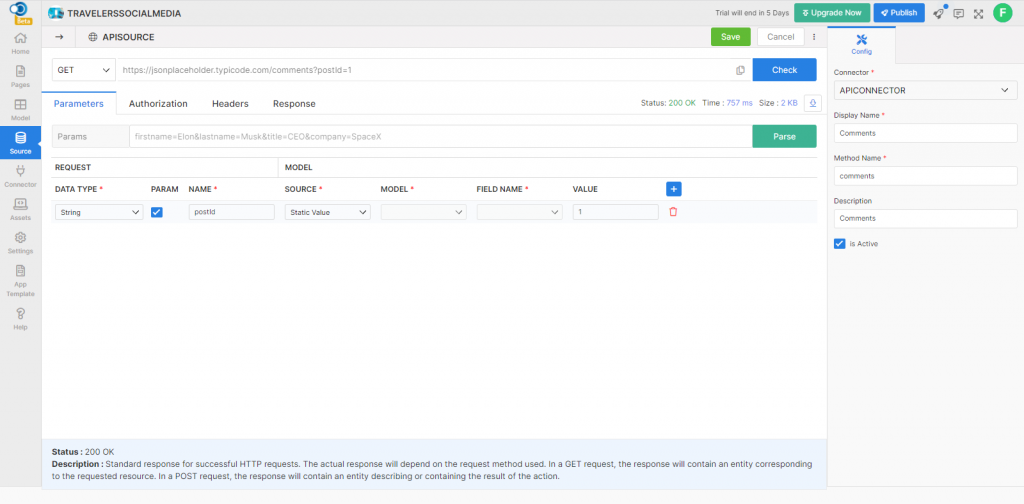
On defining the parameters, navigate to the Response tab and click on the Fetch button to fetch the response data.
Headers
Headers represent the meta-data associated with the API request and response. Click on the Add icon to add new header.
- Name – Name of the header.
- Value – Value of the header.
Response
Click on the Fetch button to get the response after filling out the config values as mentioned below.
Properties
Create Model
You can create a new model for the given request by selecting the New Model option in Model Type drop down.
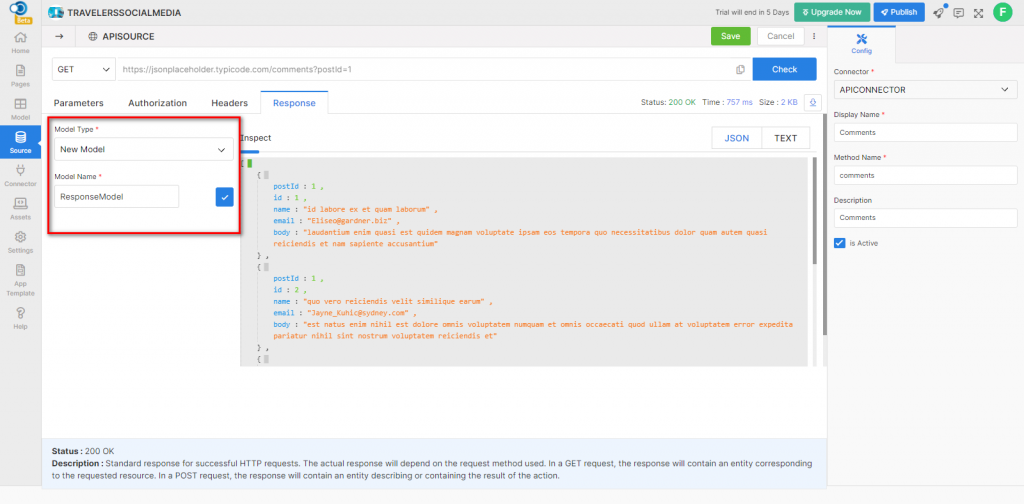
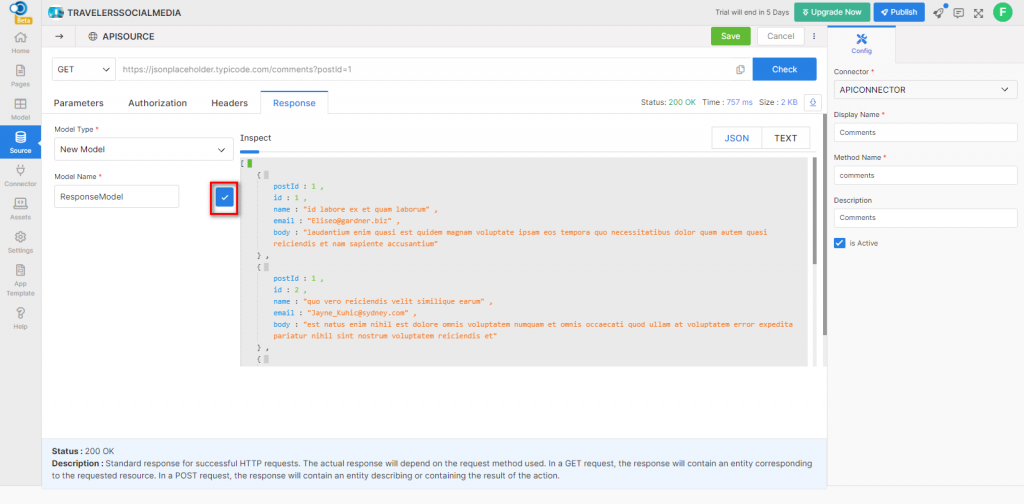
Provide the name of the model in Model Name. On providing the model name, click on the Update button against the model name to create a new model.
Select Model
You can use data models readily available in the OREOPS application for a response. To use the existing models, select the required model from the “Select Model list” and click on the Update button against the model to update the changes.
After filling all mandatory fields & selecting the response model, click on the Save button to save the changes to the data model.