
OREOPS application allows you to upload and publish the designed app in Play Store for global access.
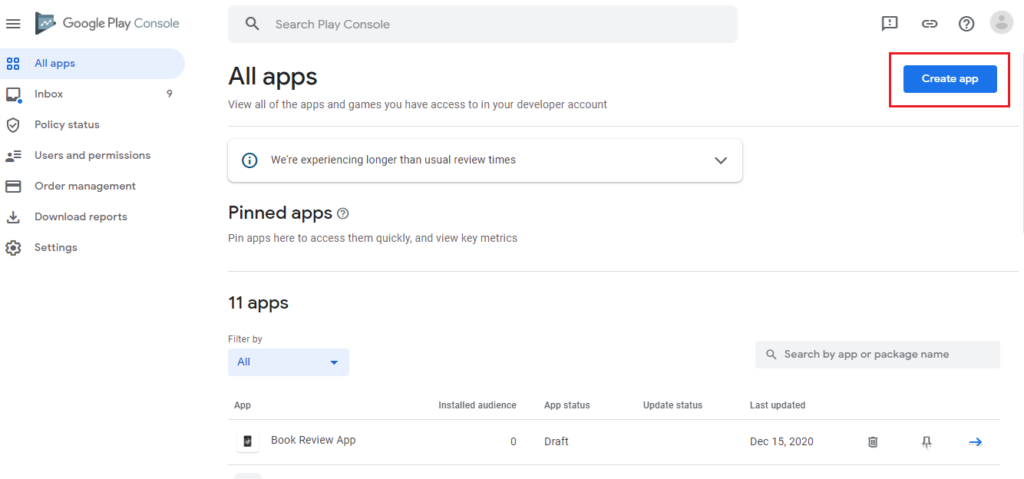
Create New App in Play Store
- Search in Google and Navigate to Google Play Console
- Login with an existing google account or create an account in Google Play Console
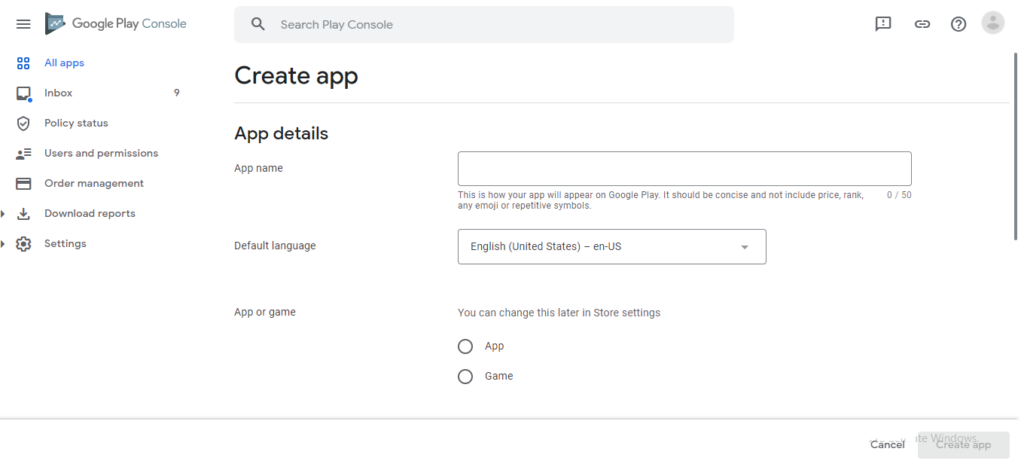
- Click on Create app button in the Google Play Console page & Enter App details
- App name – Unique name for the app
- Default Language – Select language from the dropdown
- App or Game – Select App or Game
- Free or Paid – Choose whether the app or game is free or paid
- Accept the Declarations – Developer Program Policies and US export laws
- Now click on the Create app button at the right bottom corner on the Create app page
- App gets created and a dashboard is displayed
- Set up your app – Provide information about your app and set up your store listing
- App access
- Ads
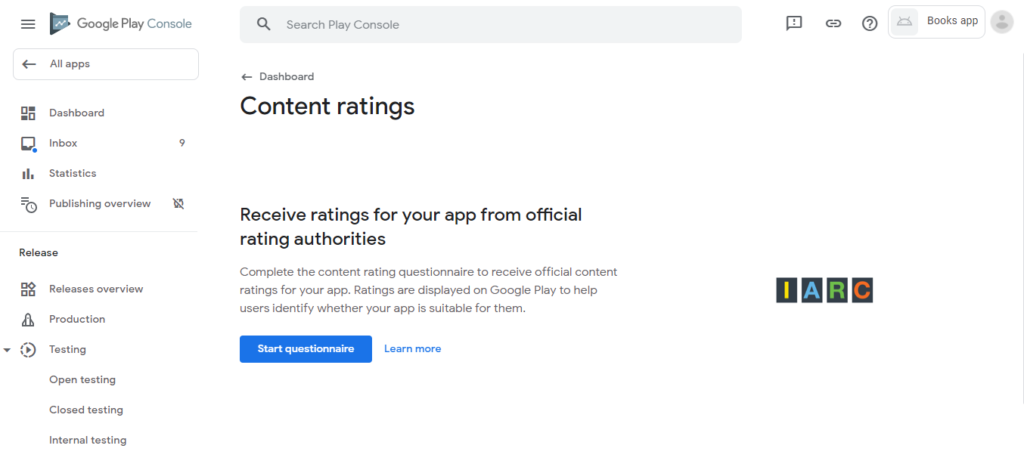
- Content ratings
- Target audience
- News app
- App category
- Main store listing
- App access – Select any one from below mentioned and click on the Save option. After saving click on the Back (<- Dashboard) option to navigate to the Dashboard page.
- All functionality is available without special access
- All or some functionality is restricted
- Ads – Select any one from below mentioned and click on the Save option. After saving click on the Back (<- Dashboard) option to navigate to the Dashboard page.
- Does your app contain ads? Check the Ads policy to make sure your app is compliant.
- Yes, my app contains ads – The ‘Contains ads’ label will be shown next to your app on Google Play.
- No, my app does not contain ads – Content ratings
- Click on the Start questionnaire button, Category section will be redirected
- Enter Email address
- Select any one Category – Below mentioned are categories
- Reference, News, or Educational
- Social Networking, Forums, Blogs, and UGC Sharing
- Content Aggregators, Consumer Stores, or Commercial Streaming Services
- Game
- Entertainment
- Utility, Productivity, Communication, or Other
- Select any one Category – Below mentioned are categories
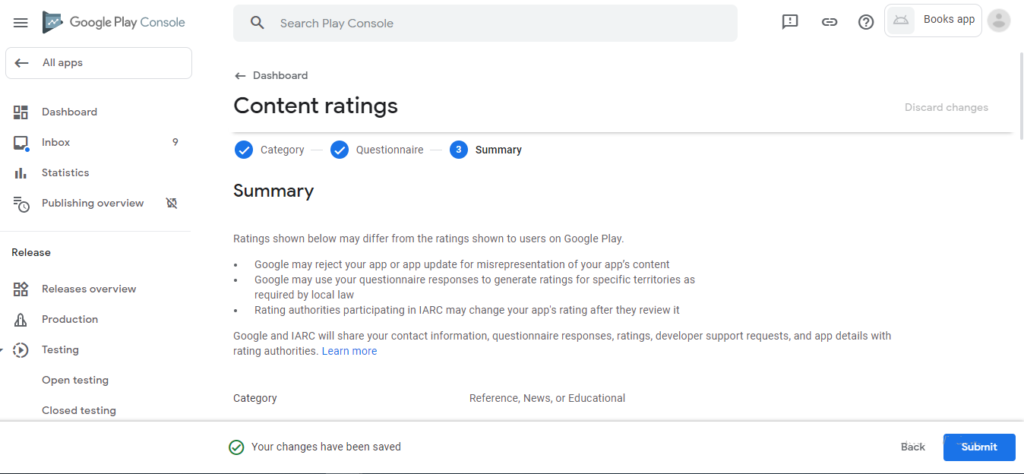
- Click on the Next button in Category section -> Based on the selected Category Questionnaire will be displayed. Below mentioned are the sample Questionnaires
- Violence – Select Yes or No
- Sexuality – Select Yes or No
- Language – Select Yes or No
- Controlled Substance – Select Yes or No
- Miscellaneous – Select Yes or No for below mentioned options
- Does the app natively allow users to interact or exchange content with other users through voice communication, text, or sharing images or audio?
- Does the app share the user’s current physical location with other users?
- Does the app allow users to purchase digital goods?
- Click on the Save option after answering all Questionnaires, Next button will be enabled.
- Click on the Next button, the Summary page will be redirected.
- Verify the Summary and click on the Submit button
- Click on the Dashboard option to go to the Dashboard page
- Target audience
- Select the available age limits and click on the Next button, Store Presence will be redirected
- Select Yes or No for Appeal to children and click on the Next button, Summary will be redirected
- Click on the Save option. After saving click on the Back(<- Dashboard) option to navigate to the Dashboard page
- News app
- Select Yes or No and click on the Save option
- After saving click on the Back (<- Dashboard) option to navigate to the Dashboard page.
- Select an app category and provide contact details
- App Category
- Select App or Game
- Select Category from dropdown
- Enter Tags -> If available
- Store listing contact details
- Enter Email address
- Enter Phone Number
- Enter Website URL
- External Marketing
- Advertise my app outside of Google Play – Select or unselect
- App Category
- Click on the Save option. After saving, click on the Dashboard to navigate to Dashboard
- Set up your store listing – Main store listing
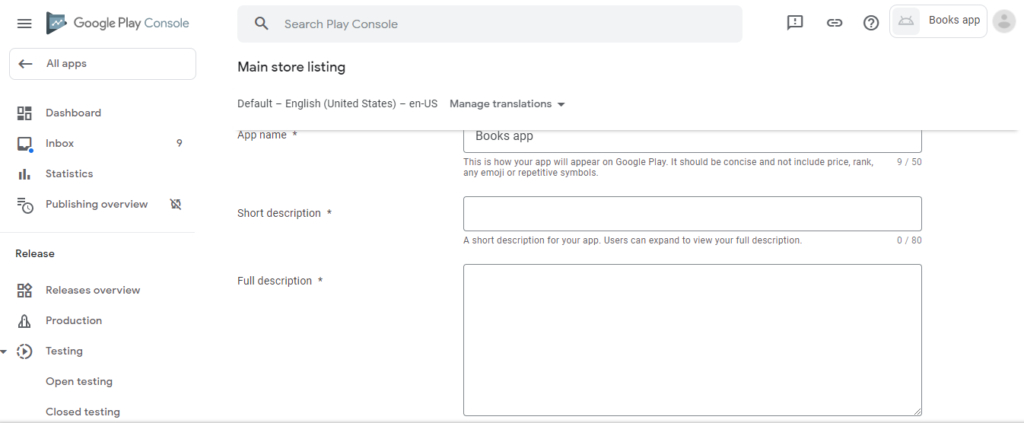
- Enter App Details
- App Name – Pre-filled
- Enter Short Description
- Enter Full Description
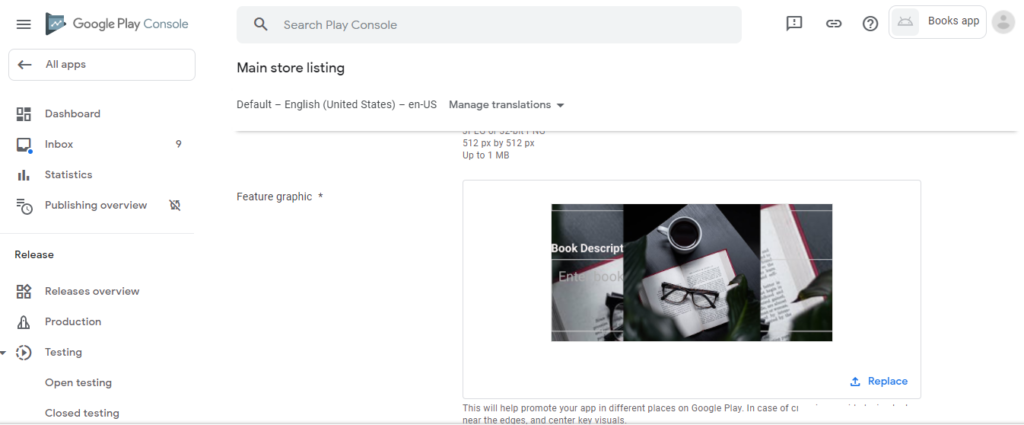
- Graphics
- Upload App icon – Your app icon to be shown in Google Play. Don’t use badges or text that suggest store ranking, price or Google Play categories (such as “top”, “new”, or “sale”). JPEG or 32-bit PNG 512 px by 512 px Up to 1 MB

- Upload Feature Graphic – This will help to promote your app in different places on Google Play. In case of cropping, avoid placing text near the edges, and center key visuals. JPEG or 24-bit PNG (not transparent) 1,024 px by 500 px Up to 1 MB
- Upload Phone screenshots – Upload 2–8 phone screenshots JPEG or 24-bit PNG (not transparent) Between 320 px and 3,840 px 16:9 aspect ratio (for landscape screenshots) Up to 8 MB
- Upload 7-inch tablet screenshots – Upload up to 8 7-inch tablet screenshots JPEG or 24-bit PNG (not transparent) Between 320 px and 3,840 px 16:9 aspect ratio (for landscape screenshots) Up to 8 MB
- Upload 10-inch tablet screenshots – Drop PNG or JPEG files here to upload up to 8 10-inch tablet screenshots JPEG or 24-bit PNG (not transparent) Between 320 px and 3,840 px 16:9 aspect ratio (for landscape screenshots) Up to 8 MB
- Enter Video URL – Add a video by entering a YouTube URL
- Click on the Save option. After saving, click on the Dashboard to navigate to the Dashboard
Publish Your App on Google Play
- Select countries and regions
- Click on the Add countries/region
- Add countries/regions to Production – Select one or many or all from the list
- After selection, click on the Add countries/region button
- Click on the Add button in the pop-up(Add countries/regions? – Your app will be available on Google Play to users from N new country/region OR Your app will be available on Google Play to users from NNN new countries/regions and Rest of World)
- Click on the Dashboard to navigate to the Dashboard
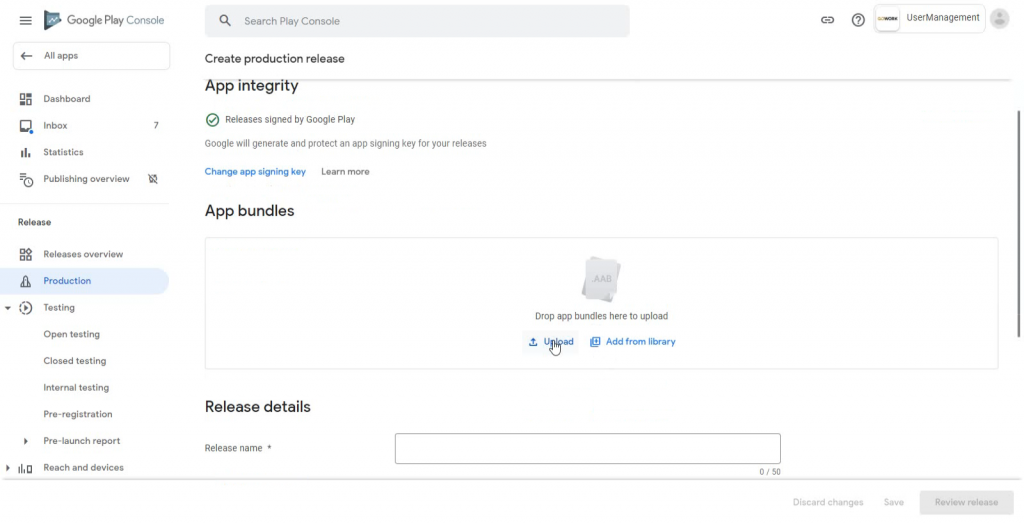
- Create a new release
- Click on Create new release
- Click on the Play App Signing in Create production release page
- Click on the Continue button if not Signed In
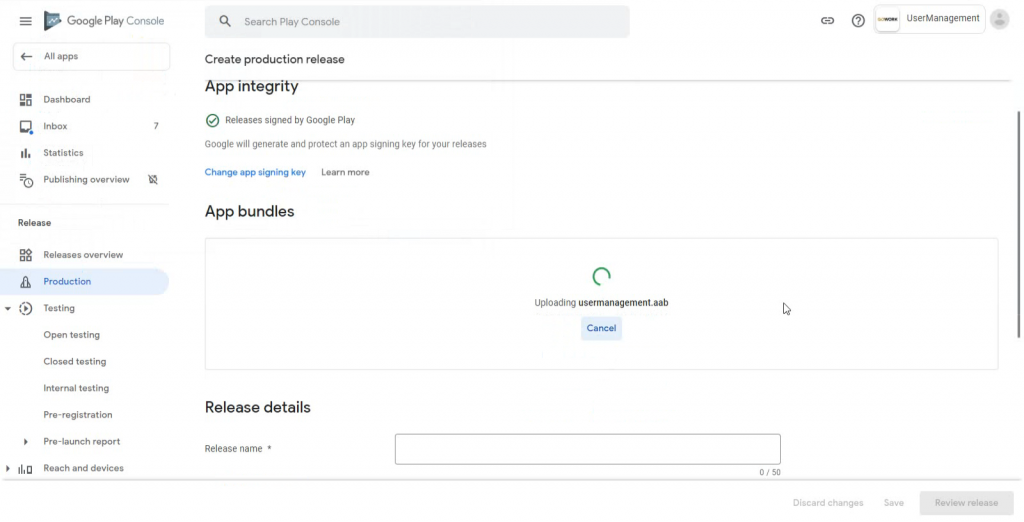
- App bundles– Click on the Upload option in App bundles section to upload the .aab file or click on the Add from library option to upload .aab file from library
- Select and upload the .aab file which you want to upload
- After successfully uploading .aab file, enter Release Details
- Enter Release Name
- Release Notes
- Click on the Save button
- After saving, click on the Review release button
- Your app will remain under review till google approves or rejects the app.
- Once the App gets approved by Play Store, Update the App – Latest version
- Click on All Apps
- Select and click the App which you want to update
- Click on the Production option & click on Create New Release button to get redirected to the Create production release page
- Upload the latest version .aab file under App bundles section
- Enter Release Name & Release notes and click on the Save option
- Click on the Review release button
Update Staged Roll-out
- Installs on active devices
- Roll-out percentage
- Country availability – Available in all targeted countries/Select specific countries/regions
- Installs targeted by rollout
- Click on the Start rollout to Production button
- Click on the Rollout button in Rollout to production? pop-up
- Your app will remain under review till google approves or rejects the app
- Finally, the App gets approved by Play Store